Building timesheet rules
As a Beeline Professional administrator, you can build rules to ensure that the correct rates are applied to timesheets, that workers are compensated appropriately, and that your budget stays on track.
You can build multiple rules, activate or deactivate, duplicate, and delete them.
| You can only delete rules that are not actively used by a process. |
You can tailor each rule to accommodate various business requirements. For example, you can set up rules to ensure compliance with local labor laws and regulations across multiple countries and regions.
A timesheet rule includes a set of input and output values. Input values determine the conditions that are checked during timesheet allocations. When the input conditions are met, the output values define which allocations apply. Each set of input and output values represents a single instruction and all instructions within a rule are executed from the top down, either daily or weekly. These instructions manage and operate pay calculations for timesheets. Time is only allocated once, which means there is no risk of inaccuracies. For more information, see About timesheet rules.
You build a rule by adding input and output items to each of your instruction rows. Next, you specify values for each item.
First, define the most specific rules such as overtime or double time. Next, define the rules that use your regular time codes. To reorder the instructions, drag and drop them to the location that you want.
Before you begin
-
Ensure you have administrator access to Professional.
-
Ensure that a work schedule is set up. For more information, see Building work schedules.
-
Define rates before you build timesheet rules. For more information, see Defining rates.
-
Check that time codes, including router time codes, are defined in the site you’re setting up. For more information, see Configuring time codes.
Steps
To set up timesheet rules, complete these steps from any supported browser.
-
Log in to Professional.
-
From the left navigation, go to . The Home tab displays.
-
From the Approver View, activate Timesheet Rules.
-
Select the Timesheet Rules tab and select Add from the upper right of the table. The Create a Rule dialog displays.
-
Enter a name and a reference ID for your rule and then select Create. The rule editor page displays.
-
Select Add Input from the Input section of the Set Rules area and add your items.

Start typing to add the following input items from the list:
-
Allocation time codes
-
Total hours
-
Day grouping

-
-
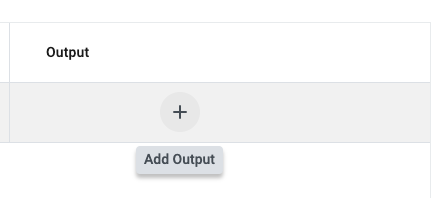
Select Add Output from the Output section of the Set Rules area and add your items.

Start typing to add the following output items from the list:
-
Allocation time codes
-
Last working day accumulation

-
-
Select + Add Row to add a new instruction row.

-
Specify values for your input items. These determine the conditions that are checked during timesheet allocations.
-
Select a router time code from the value list for the Allocation Time Code input.
-
Select an operator and the number of hours required to activate this instruction for the Total Hours input.
-
Select a value for the Day Grouping input.

-
-
Specify values for your output items. These determine the allocations that apply to this instruction.
-
Select a time code from the value list for the Allocation Time Code output.
-
Select a value for the Last Working Day Accumulation output.

-
-
Select + Add Row and specify values for a new instruction row. Add as many instruction rows as required to satisfy the conditions of your rule.