Configuring an Add Engagement smart form
As a Beeline Professional administrator, you can create smart forms that make it easier for users to add a worker record and ensure you collect the data you need to run your business. You can use smart forms to capture user data and streamline supplier worker management flows between the Beeline Professional and Supplier Network applications.
Smart forms are often associated with a single task such as creating a new engagement record. You can create and modify smart forms to include additional fields or remove fields for data you don’t need to capture in your workflows.
You can create smart forms for different types of engagements, such as for pre-identified candidates who don’t need to go through your standard souring and approval processes. And a different form for candidate engagements that must go through your standard souring and approval processes.
| To allow users to create a new engagement record that must follow your typical sourcing flows, you must configure business processes that include smart forms as part of their data collection tasks. |
To add a new engagement record in Professional, hiring managers can complete an Add Engagement type of smart form. The same Add Engagement smart form can also be made available to suppliers in the Supplier Network app, so they can add new engagement records. New engagement records can be created only for workers who are set up in Professional and have previous engagements.
Before you begin
-
You must have administrator access to Professional.
-
The Smart Forms Configuration panel includes an optional Text editor to build a smart form as an array of JSON objects. This method is for advanced configurations and requires a higher level of technical competence. If you plan to use that option, reach out to your Client Services representative.
Steps
To create an Add Engagement smart form, complete these steps.
-
Log in to Professional.
-
From the left navigation, go to .
-
In the upper right of the Smart Forms table, select Add. The Create a Smart Form dialog displays.
-
Enter a name in the Name field.
-
Select Add Engagement from the Type list.
-
Select Create Smart Form. The Smart Form Configuration page displays.
-
The Add Engagement type of smart form includes predefined elements. Review the form in the Preview panel and modify the form to better suit your requirements.
-
To add a new element, select an element in the UI panel. An + Add New Element button displays. Next, select + Add New Element, and then select the element you want to add from the list. The element you added is included after the selected element.
-
Optional: To rearrange elements, drag and drop them to the location you want in the UI editor.
-
Optional: To make your smart form available in the Supplier Network app, turn on the Available to supplier toggle.
-
Optional: To make your smart form available in Professional, turn on the Available in Professional toggle.
-
Select Save and Publish to activate the form. A confirmation banner displays in the lower left.
Next steps
Publishing a smart form makes it available to any users with access to it.
Based on the settings you chose, hiring managers can access published Add Engagement smart forms in this area in Professional:
-
On the Worker Profile page when they select Create New Engagement.
Based on the permissions you set up, suppliers can access published Add Engagement smart forms in these areas in the Supplier Network:
-
In the Workforce hub when they select the name of the worker for whom they’d like to update an engagement. The + Add Engagement button displays above the Workforce table.
 Figure 1. Actions available for selected worker records
 -
In the Workforce hub when they select .
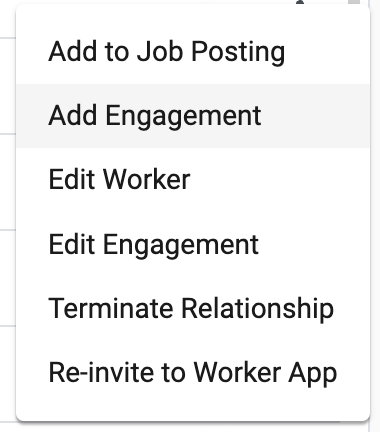 Figure 2. Actions available from the Actions menu
 -
On the worker details page, when they select Add Engagement.
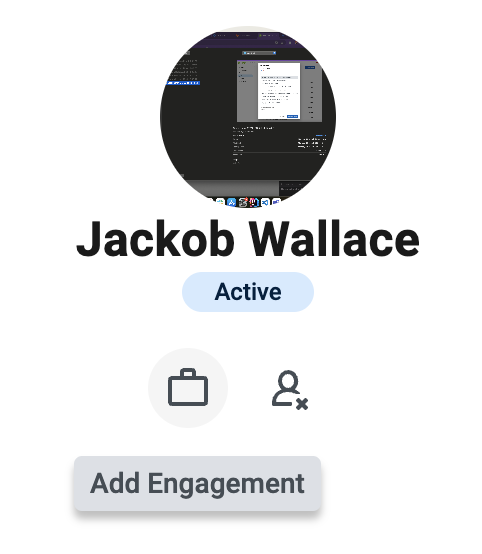 Figure 3. Actions on the worker details page