Effective dating changes
Keeping workers' engagements up to date is important to your workers and your program’s successful operations. Different fields that impact spend calculation and allocation can change, and you need a way to ensure that changes are effective on the correct date. For example, a worker may have received a pay increase backdated one month. You must apply the rate increase with an effective date in the past and ensure that timesheets are recalculated correctly.
As a program office user, you can use the Import Data tool and an Engagement Retroactive Change import template to set effective dates for fields impacting finance for an individual engagement record or a group of engagements records. Plus, you can make the effective date retroactive.
You can update retroactively the following fields:
-
Personal Email -
Tenure Start Date -
Accountable Person ID -
Supervisory Organization Reference ID -
Cost Center -
All Financial Fields -
Business Site -
Original Start Date -
Engagement Start Date -
Engagement End Date -
PO number -
Work Schedule -
Holiday Schedule -
Company -
All Rate Amount -
All Rate Currency -
All Rate Frequency
Steps to prepare your import file
To prepare your import template file, complete these steps.
-
Gather your data.
-
Update the Engagement Retroactive Change template with the data you want to change for a specific engagement record or a group of engagement records.
-
Make sure your file includes the following fields to ensure the change is correctly applied to a worker record:
-
Person ID -
Engagement ID -
Change Effective Date
-
-
Update the selected field values with the new values.
If you want to remove a field, set its name to 0.
|
You must include the Change Effective Date field to define when you want the change to be in effect on an engagement record.
When you specify a Change Effective Date and don’t specify a Change End Date, the change applies from the start date you define to the current date.
Steps to import your import file
To import, validate, and upload your file, complete these steps.
-
Log in to Professional.
-
Select Import Data from the Quick Actions list on the Home page.
-
Choose Engagement (Retroactive Change) from the Data type list.
-
Add any comments you want to store in the import log in the Note field and select Continue.
-
Upload your import file created based on the Engagement Retroactive Change template.
-
Confirm the column headers by selecting the header row and then selecting Next.
-
Map the headers from your template to their corresponding fields in Professional and select Next.
-
Review your data to identify any typos, missing values, or incorrectly formatted data. You can edit your data directly in the dialog. Hover over any highlighted areas to view warning or error details.
-
Optional: To review any potential errors, turn on the Show only rows with errors toggle in the upper right. If errors exist, you can hover over each error to view advice on resolving it. After you resolve the errors, select Import Data.
-
Select Import Data to start the import.
|
After you submit the template, a message confirms you’ve submitted it successfully and that the import has begun. The message doesn’t mean the data was successfully loaded in Professional. Check the Notifications area to view the status of your import. 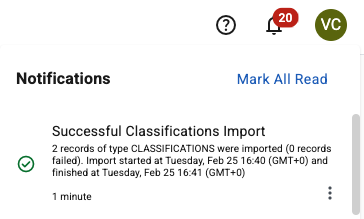
Figure 1. Example of the Notifications area message
|
Administrators can select and determine whether the import was processed successfully or find details about any errors. For more information, see Checking the status of an import process.
If the import process fails, make corrections to the template and try again.
Next steps
After your updates are processed, you can review timesheets and expenses to ensure your changes were successfully applied.
| Timesheet status | Updates |
|---|---|
Waiting For Submission |
After the timesheet/expense is submitted, your changes will automatically be applied. |
Pending |
Timesheet/expense amounts are automatically recalculated based on your updates.
The timesheet/expense remains in a |
Approved |
A timesheet/expense correction and a new timesheet/expense are automatically generated and processed. The timesheet/expense doesn’t need to be reapproved if there is only one available cost center or financial field value. If the engagement has more than one value, the worker is required to select the appropriate value and resubmit the timesheet/expense. |
Rejected |
Timesheet/expense amounts are automatically recalculated based on your updates.
The timesheet/expense remains in a |
Invoiced |
A timesheet/expense correction and new version must be generated since the invoiced amount will change. The timesheet/expense doesn’t need to be reapproved if there is only one available cost center or financial field value. If the engagement has more than one value, the worker is required to select the appropriate value and resubmit the timesheet/expense. |
Critical timesheet notifications
When a retroactive engagement change updates a cost center or financial field, any timesheets that used the old value must be reviewed by the worker or supplier so they can select the correct updated value.
Example
-
A worker’s engagement allows cost centers 1234 and 5678.
-
The worker submits a timesheet for January 4–10 with 40 hours allocated to cost center 1234. The timesheet is approved and invoiced.
-
On February 11, the program determines that cost center 1234 should not have been available and applies a retroactive engagement change to replace it with 9999.
-
Because the system cannot determine whether 9999 or 5678 is the correct replacement, it triggers a critical timesheet notification.