Scheduling Quick View exports
You can export Quick View data from Beeline Professional on a regular schedule to ensure that timely data is available when needed.
When you create a Quick View that you’d like to export again, set a schedule to export it regularly. You can define these criteria when you schedule an export:
-
The date and time the export occurs
-
The frequency the export repeats
-
The file format for the export.
You can schedule Quick View exports from these hubs:
-
Contracts
-
Engagements
-
Job Applications
-
Job Postings
-
Suppliers
-
Time & Expenses
-
Workers
-
Work Requests
| You can create only one scheduled export for each Quick View. |
To find all exported data, go to .
Before you begin
-
Identify which quick views you want to export regularly. For more information about quick views, see Creating Quick Views.
Steps
To schedule an export of quick view data, complete these steps from any supported browser.
-
Log in to your Professional tenant site.
-
From the left navigation, go to the hub where you plan to schedule exports.
-
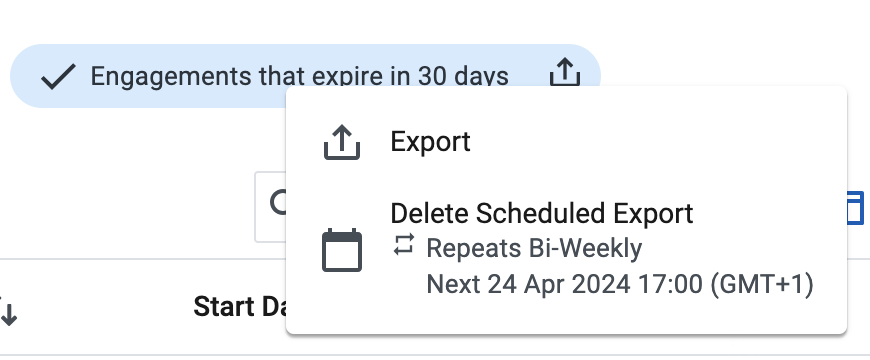
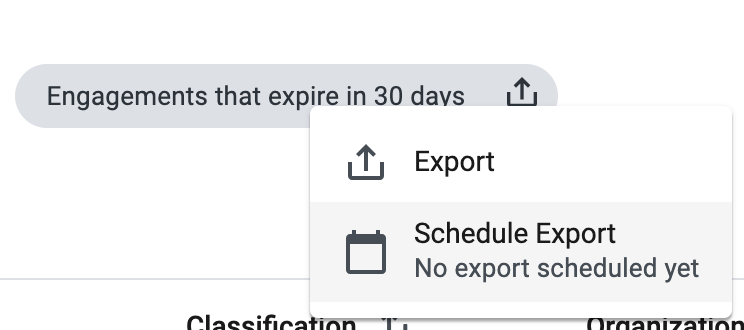
Find the quick view that you want to export and select the Export icon.
-
Select Schedule Export. A Schedule Export dialog displays.
-
Use the Start date calendar and set the date you want your export to begin.
-
From the Preferred Time list, select when you want the export to occur.
-
Set the frequency of your export using one of these options:
-
Never - to schedule the export to run only once.
-
Daily - to export data once every day.
-
Weekly - to export data once every week.
-
Bi-Weekly - to export data every two weeks.
-
Monthly - to export data once every month.
-
Annually - to export data once every year.
-
-
From the File Format list, select a format in which you want to export your information.
-
Select Schedule.
Next steps
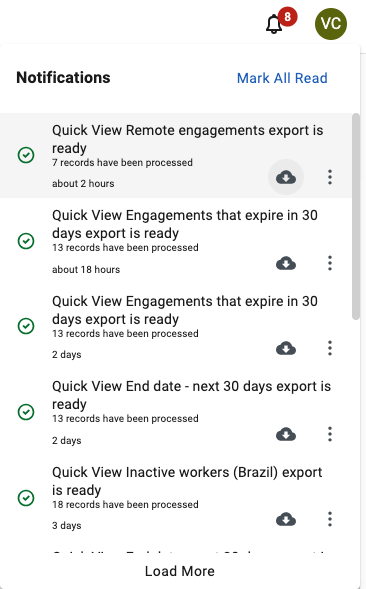
A notification displays when your export is ready. Select Notifications and then Download to save a copy of the exported file to your local device.
You can also download and review your exported Quick View data in the Reports hub. From the left navigation, go to .